
Welcome to the first part of a new series – Building an Adeptus Sororitas-themed Imperial Knight! Today it’s all about planing, so don’t be too disappointed by not seeing any Knight yet 😀
Tomorrow is the big day and I finally get my hands on an Imperial Knight. It’s not that I want to start a new army, but I simply love the model. Its design, its weapons, its pure presence. And it is a brilliant model to convert or at least to add a lot of additional details. So I decided to add a Knight to my Sisters army and eventhough it is just an Ally, it shall fit to my armies style.
Naturally, before you start such a big project, you want to plan ahead and be sure, that you got everything right and ready to begin. So here are my ideas for the conversion:
- Adding a lot of fluffy stuff
- Magnetizing the weapons
- Lightning the model with LEDs
- Create the right environment (Basing)
- Choosing the right colour scheme
Conversions – Make it Adeptus Sororitas
While thinking about my Knight and possible conversions, I strived through the internet and a lot of online-shops, searching for fluffy parts to use. Luckily, I found a lot of bits in my favorite german online-shop, Fantasywelt.de.
Two of the mainparts are these: Coal pans and skull insignias

Talking about Sororitas, I always have skulls, bones and fire in mind and those are pretty common elements on a lot of models. Combining this with seals, books and other scrolls, everything yells Ministorum!
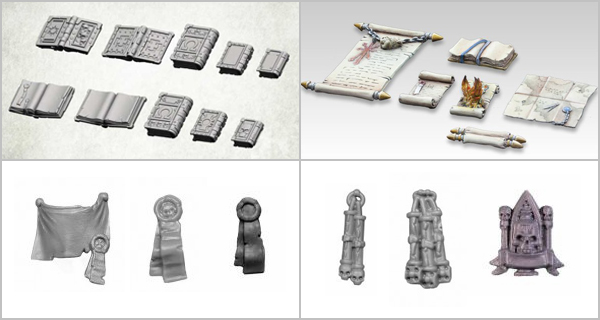
And last but not least, I found this little guy that I really want to include to the model. Eventhough I don’t know how yet 🙂

With all these additional elements, I will surely be able to bring the Sororitas feel to the table. The rest is done by the right Painting – especially the markings and symbols, like the Fleur de Lys and the Halo of my Sisters.
I initially planned to add some cathedral parts on one of the Knights Shoulders, but I couldn’t find a proper model yet … but therefor I digged out some old Cruisers and Battleships from Spacefleet Gothic. Perhaps a few bits will find it’s way on the Knight too.
Magnetizing – Keeping it flexible
Before I start building a big model like a knight, I also look out for references and one of the many tutorials I found for Knights, was how to magnetize them and how to keep certain parts movable.
First of all, I’m not a big fan of movable parts. I hate “shakey” models and I saw one video, where nearly every bigger part of the Knight was loose! Head, Arms, Torso, Weapons … That would drive me crazy. I will glue all the parts and only think carefully about the final pose. But hey, that’s really a matter of taste. (I’m also afraid of parts breaking when they are moved too often.)
Same is true for magnetizing. I’m definitely not a big fan of it. Again I saw an example, where lots of parts could be removed, but it has the same problem as not glueing. Anyway, I see 2 important reaspons to use magnets anyway for my model.
1 – Keeping weapon-options open
The Imperial Knight comes with several interesting weapon options for both hands, carapace and a smaller weapon on the torso. So the loudout may very well change in many games, always depending on your opponent and the mission. So, while buying several Knights just in case is a bad option, I decided to make at least some of these weapons changeable.
The one weapon I will glue and therefor keep forever, is the thermal cannon. I want to add some LEDs into it and realising that, while also magnetizing the arm, is too much for me 🙂 Also, it is a huge meltagun! For the holy trinity I say.
The second arm will keep the option to go for a melee weapon, which makes it flecible enough I think. And I also think abnout magnetizing the carapace weapons on top of the knight.
2 – LEDs and Batteries
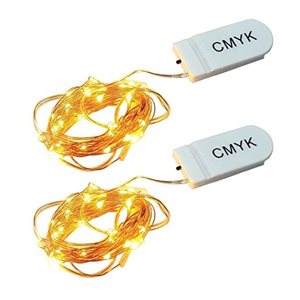
Last part I have to magnetize, is the toppanel of the torso. Since I want to use LEDs, I need an energy source and I will place it in the Knights Torso. So being able to change batteries is mandatory – luckily, I found an LED Chain with button batteries and therefor a small “body”.
Let there be Light – LEDs for the win
Speaking about LEDs, I wanted to light up my Knight. I did that often before on several of my building, but now it is time for an actual unit. I already told you how to hide the batteries, but the biggest question of course, is where to put the lights.
I haven’t got my hands on a Knight yet, so I’ll have to wait, but my current thougths are:
- Thermal Cannon (and also drilling all the small holes open)
- Exhaust-Pipes on the back/top of the Knight
- Head (Lights behind the mask)
- Below the shoulder-pads
- 1 or 2 additional parts, if I find the right spots
All LEDs on the Chain are yellow lights, but I will try to get some additional effect by colouring the inner areas that are lighted. Like painting the inner part of the thermal cannon with red/orange and apply some glossy coat. (Note to myself: THIS time, don’t basecoat over the LEDs and/or the painted inner areas -.-)
To make this happen, I will have to get the LED wire thorugh the Knights skeleton, but I’m optimistic that is is possible. Most parts already have some sort of “channel”.
It’s all about the base …
When you build a huge model like a Knight, you will naturally have a pretty huge base also. Now it is up to you if you want to keep it simple, but personally, I think there has to be some action on the base too. And therefor I wanted to integrate at least two models.

The first one is a statue of a woman in light armour and a shield. A perfect model for a base. It fits my “destroyed city” stlye for all my Sisters bases and eventhough it is a great model itself, it will not take away too much attention, since the painting will be subtle (stone).
The second one is a huge demon that will be trampled by the Knight. My Sisters have their own background and one important part of it is defending their homeworld / system from a demonic invasion. A lot of my models have parts of demons on it. A pierced demon head, a Sister holding up a demon skull and stuff like that.
So I chose a cheap demons model from Reaper Miniatures and I still have to figure out how to place it, but it will definitely have a Feet on it!
The rest of the base will be pretty simple. Sand/rocks, broken steal beams, perhaps some pipes and wires. I was thinking about placing a sister also, but that would propably be too much.
Bring some colour to your life
Last but not least, you have to think about the right colour scheme. You might change your mind on some details on the road, but some thoughts should be made before.
Do you want to apply some special symbols on the shoulder pads? Then don’t add too many bits on those spots. You want to split colours? Perhaps it makes sense to force this split with some additional bits. You want to paint the metal parts dark and the armour plates bright? Prime them seperately and assemble the parts at the end.
I will not go into detail yet, but as main colours for the armour, I’ll go for split colours. Beige marble on the one side, a dark red on the other – fitting my whole army. Luckily I learned some lessons while painting my Saint and some more miniatures since then (Heavy armoured Celestians incoming soon!) and I guess I’m ready now. We’ll see!
With all these things in mind, Im looking forward to finally start the project and hopefully it was interessing enough for you to read.
If so, stay tuned for the upcoming days and reports and let’s see where this journey will end.
May the Emperor protect you.
